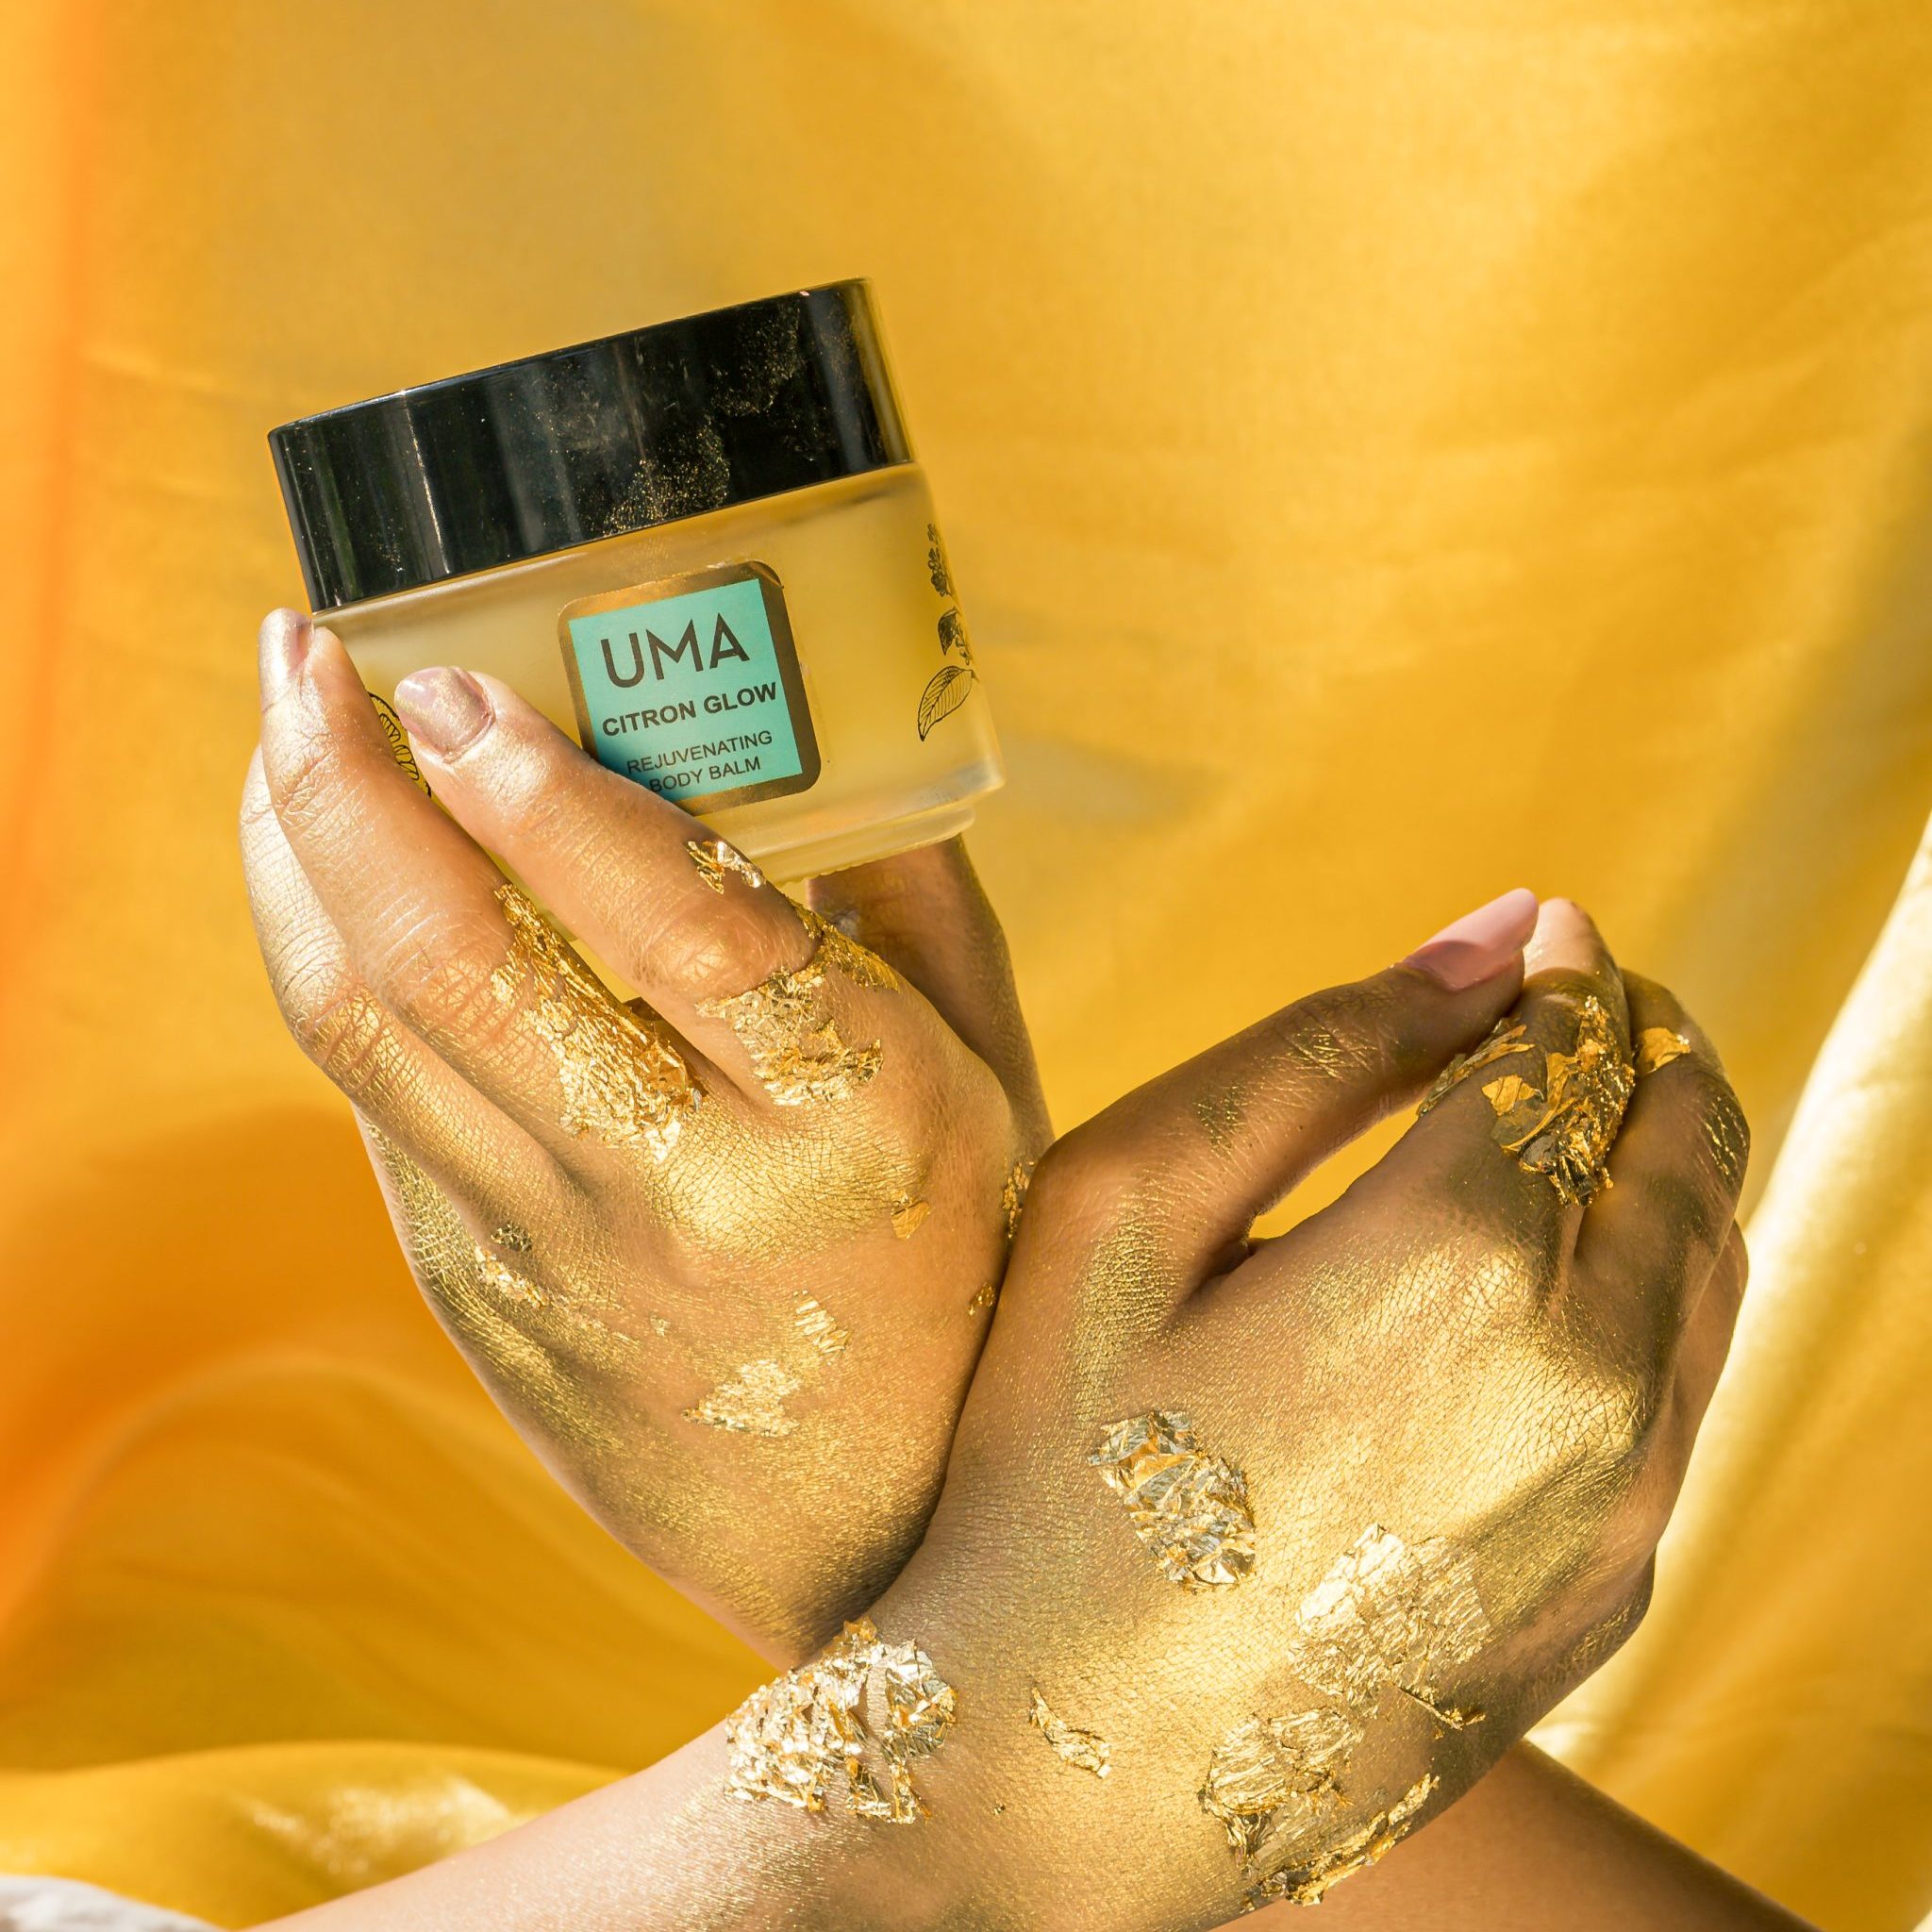
;
THE SCIENCE OF DEEPLY CLARIFYING SKINCARE: WHAT SETS UMA APART

In the ever-evolving landscape of skincare, where a plethora of products promise miraculous transformations, finding a brand that marries science with nature can feel like discovering a hidden gem. Enter UMA, a name synonymous with deeply clarifying skincare that not only delivers on its promises but also sets itself apart through its commitment to harnessing the power of botanicals backed by centuries of wisdom. In this exploration, we delve into the science behind UMA’s deeply clarifying skincare routine and unveil what truly distinguishes it from the rest.

1

THE FOUNDATION OF RADIANCE

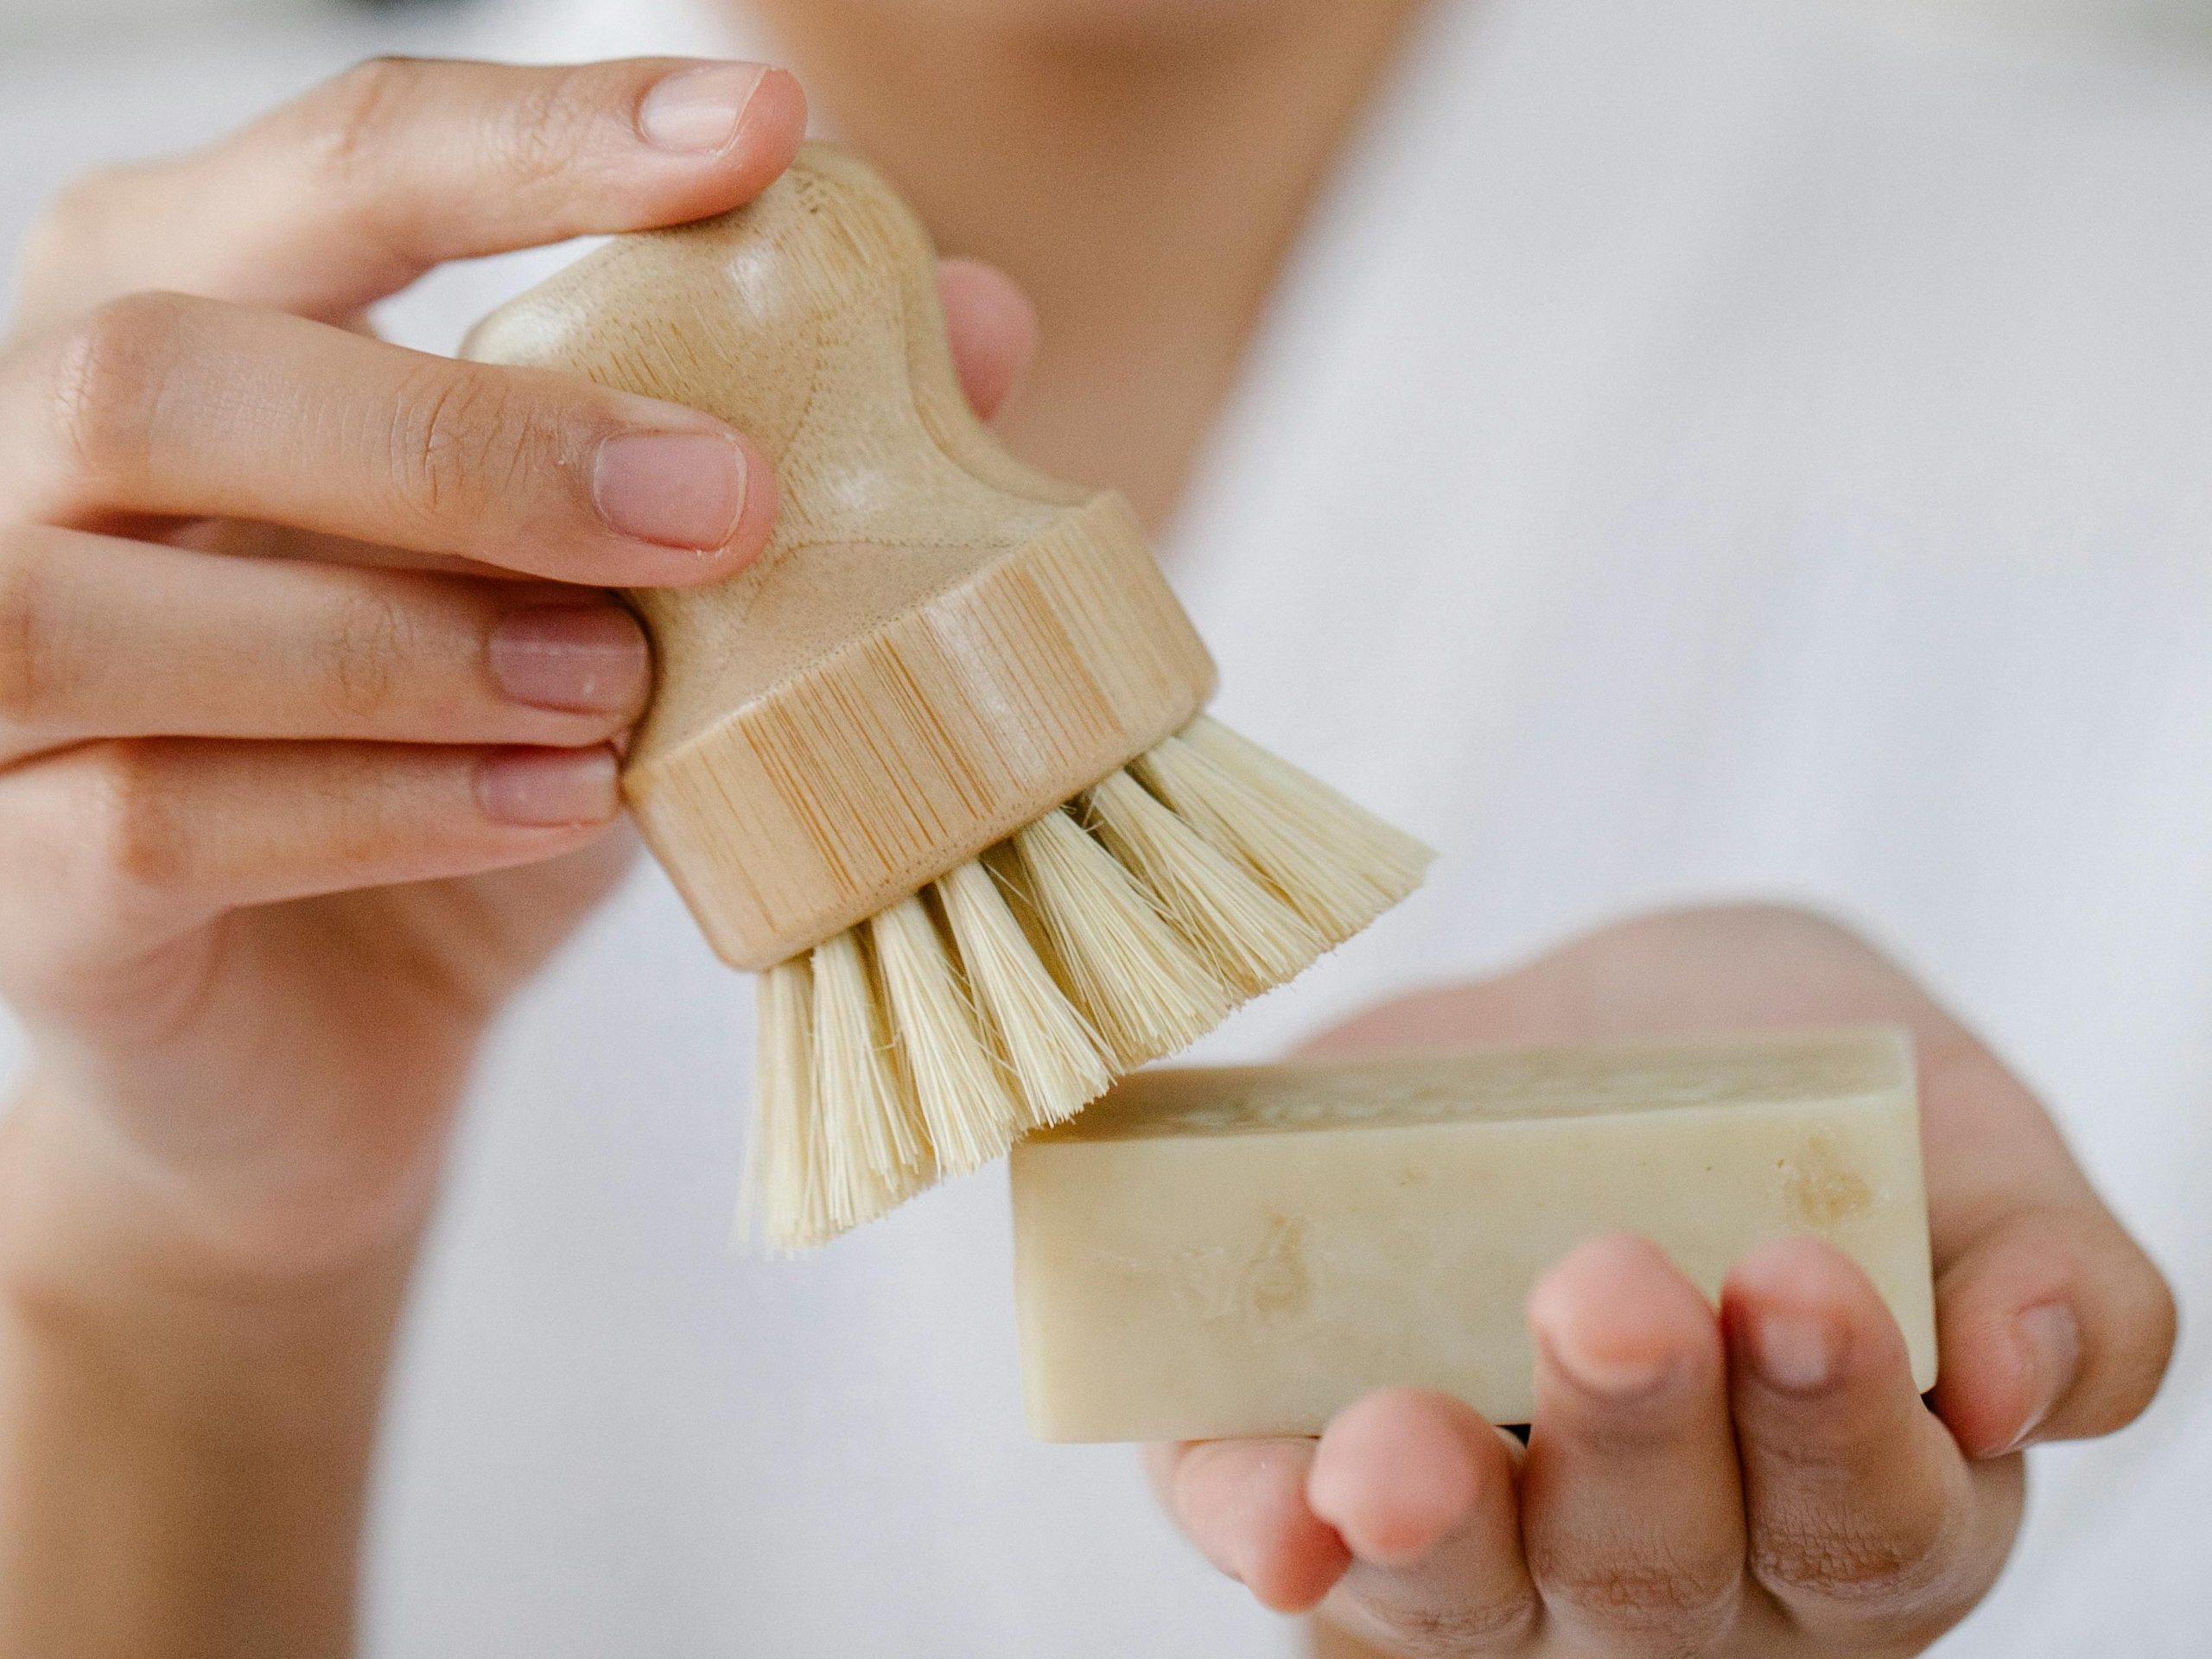
Embarking on the journey to a clearer complexion begins with the foundational step of cleansing. UMA’s Deeply Clarifying Neem Charcoal Cleanser isn’t just your average cleanser; it’s a powerhouse enriched with natural ingredients that gently cleanse, exfoliate, balance, and nourish the skin. At its core lies the potent combination of neem and charcoal, working synergistically to rid the skin of impurities and toxins while reducing inflammation and promoting hydration.

SCIENCE BEHIND THE CLEANSER: Neem, hailed in Ayurveda for its antimicrobial properties, banishes bacteria, while turmeric lends its anti-inflammatory prowess to calm and heal. With a blend of clays, oat, and botanical extracts, this cleanser goes beyond surface cleansing, drawing out impurities from within for a brighter, more radiant complexion.

“However, encouraging data suggest that neem is consistently more effective at prohibiting bacterial growth and at targeting biofilm-grown cells than many other herbal extracts.” 

[Noor, 2011]

“From the findings, the results of this research work could suggest that plant extract of neem (Azadirachta Indica) and Tumeric (Curcumin longa) possess antimicrobial properties highly effective in inhibiting the growth of some enteric pathogens in humans.”

[academicjournals.org, 2015; Researchgate.net 2010]

HOW TO USE: For 1-2 times daily cleansing, wet your face thoroughly and apply a small amount (1.5 tbsp) of cleanser in gentle circular motions for 30-45 seconds. Rinse off with cold water and pat dry. For a deeper exfoliation, leave the cleanser on to dry for 2-3 minutes before sloughing it off and rinsing with water.


2

BALANCING ACT

Moving on to toning, the UMA’ Deeply Clarifying Aloe Alum Toner is a revelation in itself. Infused with aloe, tea tree, and rose water, this toner regulates oil production, combats blemishes, and provides essential hydration and protection to the skin. With alum fortifying the skin’s natural barrier and aloe ensuring adequate moisture, this toner primes the skin for the next steps in your skincare routine.

SCIENCE BEHIND THE TONER: Tea tree, revered for its infection-fighting abilities, joins forces with mint to cool and balance the skin. Cinnamon steps in to regulate sebum production, while tomato delivers a surge of Vitamin C for protection and healing.

“Employed largely for its antimicrobial properties, Tea Tree Oil is incorporated as the active ingredient in many topical formulations used to treat cutaneous infections.”

[Clin Microbiol Rev. 2006]

“The antioxidant compounds predominately present in tomatoes consist of several different types of carotenoids, vitamin C, vitamin E, and phenolic compounds that confer their antioxidant activities by neutralizing reactive oxygen species (ROS) and protecting the cell membrane against lipid peroxidation.” 

[J.foodchem.2016, Molecules. 2020]

HOW TO USE: After cleansing, apply the toner to the skin using a cotton pad in gentle circular motions. 

ALSO READ: 7 Creative Uses of Aloe Alum Toner for Deep Cleansing and Clarification


3

PRECISION CARE

Now, onto the treatment phase with UMA’s Deeply Clarifying Blemish Spot Treatment. Formulated with a potent blend of tea tree, juniper berry, and clary sage essential oils, this treatment targets blemishes with precision while nourishing the skin. Say goodbye to dark spots and redness as this gentle yet powerful formula works its magic to restore clarity to your complexion.

SCIENCE BEHIND THE TREATMENT: Tea trees, juniper berries, and clary sage have been revered for centuries for their blemish-fighting properties. Grape seed oil and lavender ensure the treatment is as nourishing as it is effective, leaving the skin balanced and hydrated.

“Tea tree oil is an essential oil extracted from Melaleuca alternifolia (Maiden & Betch) Cheel with known antibacterial, anti-inflammatory, and antioxidant properties, making it a candidate for the treatment of acne.”

[ J. Cosmet. Dermatol. 2019]

“juniper berry also has benefits when used in natural skincare. The oil’s antiseptic and astringent properties make it a valuable addition to facial treatment formulations, particularly for those tending towards oily or blemish-prone skin.”

[Stjepan Pepeljnjak 1, Ivan Kosalec, Zdenka Kalodera, Nikola Blazević]

HOW TO USE: Apply the treatment to affected areas morning and evening after cleansing, or as needed throughout the day.


4

NOURISHING ELIXIR

Now, let’s talk about hydration and balance with UMA’s Deeply Clarifying Face Oil. This luxurious elixir moisturizes and balances oily or combination skin while combating buildup and oiliness. With a blend of clarifying ingredients like tea tree, orange, and grapeseed, this face oil brings clarity and radiance to your complexion without clogging pores or causing breakouts.

SCIENCE BEHIND THE FACE OIL: Clove essential oil targets blemish-causing impurities, while tea tree oil balances the skin. Lavender and clary sage oils regulate oiliness and prevent over-drying, making this face oil an ideal choice for oily or combination skin types.

“Linalyl acetate and linalool are the two main components of lavender essential oil and have demonstrated antioxidant properties by scavenging free radicals and decreasing oxidative stress” 

[ J. Supercrit. Fluids. 2012]

HOW TO USE: Massage a few drops(2-3) between your palms and pat onto your face, neck, and décolletage as the final step in your skincare routine.


5

THE ULTIMATE STEP

Lastly, we come to the ultimate indulgence: the UMA’s Deeply Clarifying Face Mask. Infused with potent ingredients like turmeric and neem, this mask detoxifies the skin, minimizes the appearance of blemishes, and leaves your complexion radiant and even-toned.

SCIENCE BEHIND THE FACE MASK: Turmeric and neem work in tandem to draw out impurities and soothe the skin, while a blend of botanicals gently nourishes and revitalizes.

HOW TO USE: Apply a thin layer to clean the skin, leave it on for seven minutes, then rinse off with warm water. Follow it up with Deeply Clarifying Face Oil.  


AYURVEDA: THE SOUL OF UMA’S SKINCARE

Central to UMA’s philosophy is the ancient wisdom of Ayurveda, a holistic approach to health and well-being that emphasizes balance and harmony. Each UMA product is meticulously crafted using time-honored Ayurvedic principles and potent botanicals sourced from the brand’s organic farm in India. From neem and turmeric to tea tree and clary sage, these ingredients have been revered for centuries for their transformative properties, ensuring that every UMA product delivers not just superficial results, but deep and lasting benefits for the skin.

In conclusion, UMA’s deeply clarifying skincare regimen transcends mere beauty rituals; it’s a holistic journey towards radiant, healthy skin rooted in the timeless wisdom of Ayurveda and backed by the latest advances in science. So, if you’re ready to elevate your skincare routine to a whole new level of clarity and luminosity, look no further than UMA.

10 BEGINNER-FRIENDLY YOGA ASANAS TO KICKSTART YOUR PRACTICE

Yoga, with its roots tracing back to ancient times, has transcended generations to become a widely practiced discipline today. Offering a harmonious blend of movement, breathing techniques, and meditation, yoga serves as a holistic approach to enhancing physical and mental well-being. With myriad benefits ranging from improved posture to enhanced flexibility, strength, and inner balance, yoga stands as a beacon guiding practitioners towards self-realization, ‘freedom’ (Kaivalya), and ‘the state of liberation’ (Moksha).

Did you know?

Who is the father of Yoga?

Known as the father of modern yoga, Patanjali’s teachings form the cornerstone of yoga philosophy. Additionally, Tirumalai Krishnamacharya is also revered as a significant figure in shaping modern yoga practices.

BENEFITS OF YOGA

Yoga brings the body and mind together, aiming for self-realization and liberation from various sufferings. It’s not just a physical exercise; it’s a journey towards inner peace and harmony. The classical period of yoga, lasting from 500 BC to 800 AD, emphasized the importance of a peaceful mind and its integration into other spiritual practices like Buddhism and Jainism.

Did you know? 

Which god is the master of yoga? 

As the epitome of yogic practices, Lord Shiva symbolizes the essence of yoga, encompassing various aspects such as asana, prana, mantra, and meditation.

TYPES OF YOGA POSES

Before delving into specific poses, it’s crucial to understand the various types of yoga poses and their associated benefits:

Standing Poses: Ideal for improving posture and grounding, standing poses foster a strong connection with the ground and enhance body awareness.

Balancing Poses: These poses not only strengthen the core but also improve posture by stabilizing the center of gravity.

Backbends: Offering a heart-opening experience, backbends elongate the spine and foster strength in the back muscles.

Seated Poses: Grounding and soothing, seated poses provide stability while nurturing flexibility.

Resting or Supine Poses: Serving as cooldown exercises, resting poses aid in relaxation, lowering heart rate, and promoting a meditative state.

Did you know? 

What is the birthplace of Yoga? 

Often regarded as the birthplace of yoga, Rishikesh holds a sacred allure for spiritual seekers worldwide. It is believed that meditation in this holy town paves the path to spiritual salvation.

TOP 10 BEGINNER YOGA POSES

Let’s begin by delving into ten yoga asanas suitable for beginners, endorsed by certified yoga instructors. Before we begin, consider enhancing your experience by lighting a UMA wellness incense to elevate your practice, or opt for the gentle glow of UMA candles to illuminate your journey.

1

Cat Cow Pose (Marjaiasana/Bitilasana)

HOW TO:

  • Start on all fours with your wrists directly under your shoulders and your knees below your hips.
  • For Cat Pose, exhale as you arch your back upwards, tucking your chin towards your chest.
  • For Cow Pose, inhale as you lift your chest and tailbone towards the ceiling, letting your belly drop towards the mat.
  • Alternate between Cat and Cow Pose with your breath, moving smoothly and gently.

BENEFITS: 

  • Stretches the back and promotes spinal flexibility.
  • Opens up the heart and releases tension in the neck.

2

Three-Legged Dog (Tri Pada Adho Mukha Svanasana)

HOW TO:

  • Start in a downward dog position with your hands shoulder-width apart and your feet hip-width apart.
  • Lift your left foot off the mat, extending it towards the ceiling while keeping your hips square.
  • Press evenly through your palms and the sole of your right foot.
  • Hold for a few breaths, then switch sides.

BENEFITS: 

  • Strengthens hamstrings, calves, and shoulders.
  • Opens up the hips with each leg raise.

3

Upward-Facing Dog (Urdhva Mukha Svanasana)

HOW TO:

  • Begin lying face down on the mat with your hands underneath your shoulders and elbows close to your body.
  • Press into your palms as you lift your chest and thighs off the mat, keeping your legs engaged.
  • Roll your shoulders back and down away from your ears, lifting through the crown of your head.
  • Keep your elbows slightly bent and gaze forward or slightly upwards.

BENEFITS: 

  • Opens the chest and lengthens the spine.
  • Provides relief after abdominal work.

4

Child’s Pose (Balasana)

HOW TO:

  • Start in a kneeling position with your big toes touching and knees wide apart.
  • Sit back on your heels and fold forward, reaching your arms out in front of you.
  • Rest your forehead on the mat and relax your entire body.
  • Breathe deeply into your lower back and hips, allowing them to soften and release tension.

BENEFITS: 

  • Stretches hips, thighs, and back muscles.
  • Promotes relaxation and spine lengthening.

5

Mountain Pose (Tadasana)

HOW TO:

  • Stand tall with your feet hip-width apart and arms by your sides.
  • Root down through your feet, spreading your toes wide and engaging your leg muscles.
  • Lengthen your spine, lifting your chest and rolling your shoulders back and down.
  • Keep your gaze forward and breathe deeply, finding stability and strength in this foundational pose.

BENEFITS: 

  • Improves posture and balance.
  • Strengthens the legs and enhances body awareness.

6

Forward Fold (Uttanasana)

HOW TO:

  • From Mountain Pose, exhale as you hinge at your hips and fold forward.
  • Keep a slight bend in your knees to protect your hamstrings.
  • Bring your fingertips or palms to the mat beside your feet or hold onto opposite elbows.
  • Relax your head and neck, allowing gravity to deepen the stretch.

BENEFITS: 

  • It lengthens the spine and stretches the hamstrings.
  • Releases tension in the back and neck.

7

Warrior II (Virabhadrasana II)

HOW TO:

  • Begin in a standing position with your feet wide apart, facing the long edge of your mat.
  • Turn your right foot out to the side and bend your right knee, aligning it over your ankle.
  • Extend your arms parallel to the floor, reaching actively through your fingertips.
  • Gaze over your front hand and sink deeper into the lunge, keeping your back leg strong and straight.

BENEFITS: 

  • Opens the hips and stretches the inner thighs.
  • Strengthens the legs and improves balance.

8

Wide-Legged Forward Fold (Prasarita Padottanasana)

HOW TO:

  • Stand with your feet wider than your hips and parallel to each other.
  • Hinge at your hips and fold forward, keeping your spine long and chest open.
  • Place your hands on the floor in line with your feet or hold onto your ankles.
  • Engage your thigh muscles and gently press your heels into the mat to deepen the stretch.

BENEFITS: 

  • Stretches the hamstrings and hips.
  • Relaxes the spine and promotes a sense of calm.

9

Garland Pose (Malasana)

HOW TO:

  • Begin standing with your feet hip-width apart and toes turned slightly outwards.
  • Bend your knees and lower your hips towards the ground, coming into a squat position.
  • Keep your heels on the mat and bring your palms together at your heart center.
  • Press your elbows into your inner thighs to open your hips further and lengthen your spine.

BENEFITS: 

  • Opens the hips and groin.
  • Improves balance and strengthens the lower body.

10

Corpse Pose (Savasana)

HOW TO:

  • Lie on your back with your legs extended and arms by your sides, palms facing up.
  • Close your eyes and allow your body to relax completely, releasing any tension.
  • Focus on your breath, allowing it to become slow and steady.
  • Stay in this pose for several minutes, soaking in the benefits of your practice.

BENEFITS: 

  • Promotes relaxation and stress relief.
  • Facilitates integration and reflection after practice.

Did you know? 

Who is the king of yoga?

Sirsasana is often referred to as “The king of yoga poses”. It is the most advanced form of yoga where the head is the prime part to be stabilized.

Read more with UMA Expert: 

  1. Yoga For Beginners With Anjaly Warrier 
  2. Introduction To Yoga With Shreshthi
  3. Yoga For Beginners With Kirthika S. 

In conclusion, these ten beginner-friendly yoga asanas offer a gateway to the transformative journey of yoga practice. Whether you’re seeking physical vitality or inner peace, incorporating these poses into your routine can pave the way for a harmonious union of body, mind, and spirit. Remember, the essence of yoga lies not only in the poses themselves but also in the intention and mindfulness you bring to your practice. So, roll out your mat, breathe deeply, and embark on the enriching path of yoga.

APRIL AYURVEDIC SOUPS: NOURISHING BOWLS FOR SEASONAL WELLNESS 

As the earth sheds its wintry cloak and dons the vibrant hues of spring, our bodies, too, undergo a metamorphosis. This season embodies the qualities of sattva—clarity, purity, expansiveness, and light. Ideally, spring is a time when the thick, heavy energies of kapha begin to transition and fall away, leaving us feeling refreshed and revitalized. What better way to support this seasonal transition than with nourishing bowls of Ayurvedic soups? Let’s explore three delicious recipes designed to align with the energies of spring and promote wellness from within.

1

WATERCRESS & ASPARAGUS SOUP

This vibrant green soup inspired by The Banayan Botanicals not only tantalizes the taste buds but also provides a burst of seasonal freshness. With the crispness of asparagus and the peppery notes of watercress, it’s a delightful way to embrace spring.

Benefits:

  • Asparagus: Rich in antioxidants and a natural diuretic, asparagus helps to flush out toxins from the body, making it an ideal choice for spring detoxification.
  • Watercress: Packed with vitamins and minerals, watercress supports immune health and promotes overall vitality.
  • Avocado: Provides healthy fats and creamy texture, enhancing the soup’s satiating quality.
  • Lemon Juice: Adds a zesty kick and boosts digestive fire (Agni), aiding in the assimilation of nutrients.

Ingredients:

  • 2 tablespoons ghee
  • 1 bunch (about 1 lb) asparagus, chopped (save some of the tops for garnishing)
  • 1 bunch watercress
  • 1 avocado (save some for garnishing)
  • ½ cup flat-leaf parsley, chopped

PREPARATION TIME: 35 mins

  • 2 cups hot water
  • 2 tablespoons lemon juice
  • 1 teaspoon fresh grated ginger
  • ½ teaspoon coriander powder
  • Pinch of asafoetida
  • Salt and pepper to taste

Process:

  • Heat the ghee in a medium soup pot. Add the ginger, coriander, and asafoetida, and sauté for 1–2 minutes or until the fragrance is released, stirring frequently to avoid burning.
  • Add the asparagus and continue to cook for 3–4 minutes until tender. Reduce heat to low, add the watercress, and cook for 2–3 more minutes.
  • Transfer the mix to a high-speed blender, and add the avocado, fresh parsley, lemon juice, and water. Purée until creamy. Taste and season with salt and pepper.
  • To serve, pour into individual bowls and garnish with chopped avocado and asparagus tops. For a heartier meal, pour soup over a large scoop of well-cooked quinoa.

2

HEALING IMMUNE BOOSTING SOUP

This soup is more than just a culinary delight inspired by Hummusapien—it’s a potent elixir for boosting immunity and nourishing the body from the inside out. Packed with vegetables, lentils, and aromatic spices, it’s a comforting bowl of wellness.

Benefits:

  • Garlic: Known for its antimicrobial properties, garlic helps to combat infections and strengthen the immune system.
  • Turmeric and Ginger: Anti-inflammatory and antioxidant-rich, turmeric and ginger provide a powerful defense against seasonal illnesses.
  • Red Lentils: A good source of plant-based protein and fiber, red lentils contribute to satiety and stable energy levels.
  • Greens: Kale, spinach, or chard offer a plethora of vitamins, minerals, and phytonutrients, supporting overall health.

Ingredients:

  • Mirepoix (Onion, celery, and carrot)
  • 4 cloves garlic, minced
  • 1 tablespoon fresh turmeric, grated
  • 1 tablespoon fresh ginger, grated
  • 2 parsnips, peeled and chopped
  • 1 cup red lentils

PREPARATION TIME: 40 mins

  • 6 cups vegetable broth
  • 2 cups water
  • Salt and black pepper to taste
  • 4 cups kale, chopped
  • ½ cup fresh parsley, chopped
  • Juice of 1 lemon

Process:

  • Warm olive oil in a large pot or Dutch oven over medium heat. Once hot, add onion and sauté for 3 minutes.
  • Add carrots, parsnips, and celery and sauté for another 5 minutes. Add garlic, turmeric, and ginger and sauté for 1 minute.
  • Add broth, water, lentils, salt, and pepper. Stir and bring to a boil. Reduce heat to low and simmer, covered, for 15 minutes.
  • Remove from heat. Stir in kale, parsley, and lemon juice. Cover and let greens steam for a few minutes. Season to taste and enjoy!

3

COOLING PITTA WITH COCONUT SOUP

Designed to pacify the fiery energy of Pitta, this coconut-infused soup offers a refreshing reprieve on hot summer days. Inspired by Ayurvedic Wellness.center creation of this blend of cooling herbs and nourishing ingredients, is a soothing antidote to excess heat.

Benefits:

  • Coconut Milk: Rich in healthy fats and electrolytes, coconut milk cools and hydrates the body, making it ideal for Pitta types.
  • Lemongrass and Kaffir Lime Leaves: Known for their cooling properties, lemongrass and kaffir lime leaves impart a refreshing citrus aroma to the soup.
  • Mushrooms: Provide a savory depth of flavor and a host of immune-boosting benefits.
  • Fresh Cilantro: Adds a burst of freshness and aids in detoxification.

Ingredients:

  • 4 cups organic broth (chicken or veggie)
  • 1 lemongrass stalk, cut into 1-inch pieces and crushed
  • 4 fresh kaffir lime leaves, torn in 1/2
  • 1 (3-inch) piece fresh ginger, thinly sliced
  • 1 lb organic or free-range boneless, skinless chicken, cut into thin strips (optional)
  • 8 oz shiitake, straw, or other mushrooms, rinsed and sliced
  • 1-2 small green Thai chiles, sliced very thin (optional, reduce or eliminate if Pitta is raging)
  • 4 tablespoons fish sauce

PREPARATION TIME: 50 mins

  • 2 tablespoons sugar
  • 1 (13-ounce) can organic coconut milk
  • ¼ cup freshly squeezed lime juice
  • ¼ cup fresh chopped cilantro leaves
  • 2 cups cooked brown or white (more cooling) basmati rice
  • Himalayan mineral salt and freshly ground black pepper

Process:

  • In a soup pot, combine and bring to a boil the broth, lemongrass, lime leaves, and ginger. Lower heat, cover, and simmer for 10 minutes to infuse the broth with flavor.
  • Strain the infused broth, discard the aromatics, and return the broth to the pot.
  • Add chicken, mushrooms, chiles, fish sauce, sugar, coconut milk, and lime juice and simmer for another 10 minutes until the chicken is cooked through.
  • Season the soup with salt and pepper. Add ¼-½ cup cooked brown rice to each bowl and serve soup topped with fresh cilantro leaves.

Discover more Pitta pacifying recipes here: 

  1. WHAT IS AN AYURVEDIC DIET? DOS & DONT’S EXPLAINED! 
  2. EXPERT ADVICE: DR. VARALAKSHMI’S TIPS ON HOW TO GET RID OF BLOATING IN AN AYURVEDIC WAY
  3. SPRING DETOX: AYURVEDIC RECIPES TO PACIFY PITTA DOSHA IN APRIL


Incorporate these nourishing Ayurvedic soups into your springtime repertoire and savor the flavors of seasonal wellness. From cleansing greens to comforting broths, each spoonful offers a taste of rejuvenation for mind, body, and spirit. Embrace the essence of spring and let your bowls overflow with vitality.

SPRING DETOX: AYURVEDIC RECIPES TO PACIFY PITTA DOSHA IN APRIL

Spring is the perfect time to rejuvenate our bodies after the winter months. As the days grow longer and nature begins to blossom, it’s an ideal opportunity to embark on a spring detox journey. The colder months often leave us feeling sluggish, and our bodies may crave lighter, fresher foods to renew vitality. In this blog, we’ll delve into the realm of Ayurvedic detoxification, exploring the benefits of spring cleansing and presenting nourishing recipes to pacify Pitta Dosha and revitalize your being.

WHY SPRING DETOX?

Before we delve into the recipes, let’s understand why a spring detox can be beneficial. During the winter, we tend to indulge in heavier foods, coupled with reduced physical activity. This can burden our digestive system, liver, and kidneys. A spring detox allows us to shed accumulated toxins, promoting better digestion, improved energy levels, clearer skin, and mental clarity. By embracing cleansing practices, we support our body’s natural ability to heal and thrive.

UNDERSTANDING AYURVEDIC DETOX 

Ayurveda, the ancient Indian system of medicine, advocates for holistic detoxification to maintain overall well-being. An Ayurvedic spring cleanse typically involves simplifying the diet, focusing on easily digestible foods that support the body’s natural detox processes. One such staple of Ayurvedic cleansing is kitchari—a nourishing porridge made from mung dal, rice, spices, and ghee. Despite its simplicity, kitchari provides essential nutrients while giving the digestive system a break.

WHY SPRING DETOX?

Before we delve into the recipes, let’s understand why a spring detox can be beneficial. During the winter, we tend to indulge in heavier foods, coupled with reduced physical activity. This can burden our digestive system, liver, and kidneys. A spring detox allows us to shed accumulated toxins, promoting better digestion, improved energy levels, clearer skin, and mental clarity. By embracing cleansing practices, we support our body’s natural ability to heal and thrive.

BENEFITS OF SPRING CLEANSE

The benefits of a spring cleanse extend beyond physical health. Alongside weight loss and improved digestion, individuals often experience renewed energy, enhanced sleep quality, and mental clarity. By eliminating toxins, we create space for vitality to flourish, paving the way for a more vibrant and balanced life.

AYURVEDIC RECIPES FOR SPRING DETOX

Now, let’s explore some Ayurvedic recipes tailored to pacify Pitta Dosha and support your spring detox journey.

1

COMFORTING CILANTRO RICE SOUP

Ingredients:

  • 1 cup Basmati Rice
  • 2 pinches Black Pepper
  • 1/4 cup Cilantro
  • 1 clove Garlic
  • 1 tbsp Ghee
  • 1/2 inch Fresh Ginger
  • 1/4 tsp Mineral Salt

Preparation:

  • Grind rice into a powder. Sauté ginger and garlic in ghee, then add rice powder and water. Cook until soft.
  • Add chopped cilantro, salt, and pepper. Simmer until flavors meld.

PREPARATION TIME: 45 mins

Benefits:

  • Digestive Support: Rice is easy to digest and soothing for the stomach, while ginger and garlic aid digestion and promote gut health.
  • Anti-Inflammatory: Cilantro has anti-inflammatory properties, helping to reduce inflammation in the body and support overall health.
  • Balancing: Ghee provides nourishment and balances Vata and Pitta doshas, supporting overall well-being.

2

VIBRANT KALE & SWEET POTATO STIR- FRY

Ingredients:

  • 3/4 inch Fresh Ginger
  • 1/2 lbs Kale
  • 2 pinches Mineral Salt
  • 1 tbsp Sunflower Oil
  • 2 cups Sweet Potato

Preparation:

  • Boil the kale until the leaves turn vibrant green. Strain and set aside.
  • In a separate pot, boil diced sweet potatoes until soft. Save the sweet water for later use.
  • Grate and sauté ginger in sunflower oil. Add cooked sweet potatoes and kale. Mix gently.

PREPARATION TIME: 40 mins

Benefits:

  • Detoxification: Kale and sweet potatoes are rich in antioxidants and fiber, aiding in detoxification and promoting gut health.
  • Nutrient-Rich: Sweet potatoes are packed with vitamins and minerals, including vitamins A, C, and potassium, supporting overall health.
  • Digestive Support: Ginger stimulates digestion and relieves digestive discomfort, making this dish soothing for the stomach.

3

GOLDEN HARVEST SOUP WITH SPICED GINGER

Ingredients:

  • 1/4 tsp Black Pepper
  • 4 cups Butternut Squash
  • 1 tsp Fennel Seeds
  • 2 cloves Garlic
  • 2 tbsp Ghee
  • 1/2 inch Fresh Ginger
  • 1/2 Lime
  • 1/4 tsp Mineral Salt
  • 4 cups Water
  • 1/2 cup Yellow Onion

Preparation:

  • Roast butternut squash in the oven, then chop into cubes.
  • Sauté onions, ginger, and garlic in ghee. Add fennel seeds, salt, pepper, and butternut squash cubes. Cook until soft.
  • Mash or puree the mixture, then add lime juice.

PREPARATION TIME: 50 mins

Benefits:

  • Immune Support: Garlic, ginger, and onion are known for their immune-boosting properties, helping to strengthen the body’s defenses.
  • Digestive Aid: Fennel seeds aid digestion and relieve bloating, while butternut squash is gentle on the stomach, making this soup soothing for digestion.
  • Antioxidant-Rich: Butternut squash is rich in beta-carotene, an antioxidant that supports eye health and overall immunity.

DID YOU KNOW?

Ginger, garlic, and onion are a combination used ubiquitously in Asian cooking known as “tri-root.”


4

GARDEN FRESH ALMOND COLLARD ROLLS 

Wrap Ingredients:

  • 1 bunch collard greens
  • 1/2 jicama
  • 1 carrot
  • 1 beet
  • 1 cup mung bean sprouts
  • Fresh mint and basil
  • Fresh ginger and turmeric

Almond Sauce Ingredients:

  • 2 tbsp lime juice
  • 2 tsp Braggs Liquid Aminos
  • 2 tsp honey
  • 2 tbsp roasted almond butter
  • 2 tbsp water
  • 1/2 tsp black pepper
  • 1 tbsp fresh ginger

Instructions:

  • Steam collard greens, then layer with jicama, carrot, beet, sprouts, mint, basil, ginger, and turmeric. Roll tightly.
  • Mix almond sauce ingredients until creamy, and serve with wraps.

PREPARATION TIME: 50 mins

Benefits:

  • Rich in Potassium: Collard greens are rich in potassium, which is essential for regulating heartbeat, and muscle function, and balancing the effects of sodium in the body. Consuming potassium-rich foods like collard greens helps support cardiovascular health.
  • Low Glycemic Index: Collard greens have a low glycemic index, meaning they won’t cause a rapid spike in blood sugar levels after eating. This makes them suitable for individuals managing blood sugar levels and those following a diabetic-friendly diet.
  • Heart Health: Almond butter, a key ingredient in the almond sauce, is high in monounsaturated fats, which are beneficial for heart health. These healthy fats help lower LDL (“bad”) cholesterol levels while raising HDL (“good”) cholesterol levels, reducing the risk of heart disease.
  • Immune Support: The almond sauce contains ingredients like fresh ginger, lime juice, and black pepper, which are known for their immune-boosting properties. Ginger and lime juice provide vitamin C and antioxidants, while black pepper helps enhance the absorption of nutrients in the body, supporting overall immune function.
  • Nutrient Density: The fillings in the collard wraps, including jicama, carrots, beets, and mung bean sprouts, offer a wide range of vitamins, minerals, and phytonutrients. These nutrient-dense ingredients support overall health and provide essential nutrients for bodily functions.
  • Digestive Health: Fresh mint and basil, along with ginger and turmeric, contribute to digestive health and may help alleviate digestive discomfort. These herbs and spices have been traditionally used to support digestion and reduce inflammation in the body.


By incorporating nourishing recipes into our diet, we can support our body’s natural cleansing processes and emerge feeling rejuvenated and energized. Remember, spring detox isn’t just about physical health—it’s about fostering balance and harmony in body, mind, and spirit. Cheers to a season of wellness and transformation!

DON’T GUIDE: SKIPPING PRE-DRY BRUSHING PREPARATION STEPS YOU’LL REGRET 

Dry brushing – it sounds like one of those beauty rituals straight out of ancient times, doesn’t it? Well, that’s because it is! Dating back centuries, Garshana has been hailed as an Ayurvedic medicine, purported to have numerous health benefits. But before you dive headfirst into this seemingly magical practice, let’s talk about why skipping pre-dry brushing preparation steps is something you’ll deeply regret.

WHAT IS GARSHANA?

Garshana is an ancient Ayurvedic practice of dry brushing that has been used for centuries to promote health and well-being. This practice, also known as “polishing or rubbing” in Sanskrit, involves the use of a special brush made from natural fibers to massage the skin in circular motions.

1

DON’T RUSH: UNDERSTAND THE BASICS

First things first, let’s understand what dry brushing is all about. It’s a technique where you vigorously brush your skin with natural bristles, typically before you shower. This process isn’t just about exfoliation; it’s believed to enhance circulation, aid in detoxification, and even promote better digestion. Sounds fantastic, right? But here’s the catch – skipping crucial preparation steps can turn your dry brushing dream into a skincare nightmare.

2

DON’T IGNORE: POTENTIAL RISKS AND CONSIDERATIONS

While dry brushing boasts a plethora of benefits, it’s not suitable for everyone. Individuals with sensitive skin or certain skin conditions like eczema or psoriasis should exercise caution or consult a healthcare professional before attempting dry brushing. Moreover, areas with open wounds or inflammation should be avoided during the process to prevent further irritation or complications.

3

DON’T SKIP: PROPER TECHNIQUES AND SUPPLIES  

To embark on a successful dry brushing journey, you’ll need the right tools and techniques. Opt for a brush with natural bristles and a long handle for optimal reach. May we suggest, UMA Lymphatic Detox Dry Brush? Start from your feet and work your way up in gentle, circular motions, always moving towards your heart. Remember to adjust the pressure based on the thickness of your skin and avoid sensitive areas or those with existing skin issues.

Here is a dry brushing guide: 

Dry Brushing is the Simple Wellness Booster you Need 

4

DON’T UNDERESTIMATE: PRE- DRY BRUSHING RITUALS 

Now, let’s dive into the essential pre-dry brushing rituals that you simply can’t afford to skip:

1. Choose the Right Products: Incorporating body oils like UMA Absolute Anti Aging Body Oil or UMA Citron Glow Body Oil can enhance the dry brushing experience. These oils not only provide lubrication for smoother strokes but also offer additional skincare benefits, nourishing and hydrating the skin.

2. Focus on Lymphatic Drainage: Prioritize UMA Lymphatic Drainage Dry Brushing to optimize the detoxification process. This specialized technique targets the lymphatic system, aiding in the removal of toxins and promoting overall wellness.

WHAT IS LYMPHATIC DRAINAGE?

Lymphatic drainage refers to the process by which the lymphatic system works to drain excess tissue fluid back into circulation. The lymphatic system comprises lymphatic vessels, lymphatic organs, lymph nodes, and lymphoid tissue scattered throughout the connective tissue. Lymph, which is essentially tissue fluid, circulates through these lymphatic channels, facilitating the removal of waste products and maintaining fluid balance within the body.

Lymphatic Drainage 2023

3. Establish a Routine: Consistency is key when it comes to dry brushing. Set aside dedicated time in your schedule for this ritual, whether it’s a few times a week or daily. By making dry brushing a regular part of your skincare routine, you’ll maximize its benefits over time.

5

DON’T OVERDO IT 

Dry brushing might seem like a miracle worker, but moderation is key. Start slow, with just once or thrice a week, and gradually increase the frequency as your skin adjusts. And if your skin starts showing signs of irritation, dial it back or consult a dermatologist.

6

DON’T FORGET: POST-DRY BRUSHING CARE  

Once you’ve completed your dry brushing session, don’t neglect post-brushing care. Follow up with a cool shower to rinse off dead skin cells, then moisturize your skin with natural plant oils or hydrating balms. May we suggest UMA Absolute Anti Aging Body Balm or UMA Citron Glow Body Balm? This step helps replenish moisture and seals in the benefits of dry brushing, leaving your skin soft, smooth and rejuvenated.

7

DON’T BRUSH ASIDE HYGIENE 

Your dry brush is your skin’s best friend, but only if it’s clean. Rinse your brush after each use and let it dry in a well-ventilated area to prevent mold or mildew. Give it a good cleaning with soap and water at least once a week to keep bacteria at bay.

In conclusion, dry brushing can be a transformative addition to your skincare routine, but only if you approach it with the proper preparation and care. By following these pre-dry brushing rituals and heeding our “don’ts” guide, you’ll set yourself up for a rewarding and fulfilling dry brushing experience. So, before you pick up that brush, remember: don’t skip the preparation steps—you’ll regret it!

SPRING INTO BALANCE: AYURVEDIC SELF-CARE ESSENTIALS FOR KAPHA SEASON

As spring blossoms into full swing, so too does the Kapha dosha, ushering in a season marked by rejuvenation and renewal. In Ayurveda, the ancient science of holistic healing, each season is associated with a specific dosha or mind-body type, and spring is the domain of Kapha. Kapha is characterized by qualities of heaviness, coolness, and moisture, and its influence can manifest not only in our internal constitution but also in our skin.

UNDERSTANDING KAPHA SKIN 

Kapha skin, with its thick texture and tendency towards oiliness, requires regular cleansing and exfoliation to prevent clogged pores and breakouts. The excess sebum production can lead to acne and blackheads, making it crucial to keep the skin clean and clear. Kapha individuals may find their skin to be cool to the touch, reflecting the inherent qualities of this dosha.

EMBRACING AYURVEDIC SELF-CARE 

In Ayurveda, beauty is seen as an expression of inner balance and vitality, with the mantra “true beauty comes from within” serving as a guiding principle. To address imbalances in Kapha skin, Ayurvedic skincare focuses on holistic practices that encompass not only external treatments but also lifestyle modifications. By harmonizing the entire body, Ayurvedic skincare can help eliminate doshic imbalances and promote radiant, healthy skin.

AYURVEDIC SKINCARE ESSENTIALS FOR KAPHA SEASON 

To support Kapha skin during the spring season, it’s important to incorporate products specifically formulated to balance excess oiliness and promote clarity and vitality. Here are some Ayurvedic self-care essentials from UMA that are ideal for Kapha skin:

1

Incorporating UMA’s Deeply Clarifying Gift Set

  • Deeply Clarifying Face Oil: Balances oil production and revitalizes skin.
  • Deeply Clarifying Cleanser: Gently removes impurities without stripping moisture.
  • Deeply Clarifying Toner: Refines pores and texture.
  • Deeply Clarifying Mask: Detoxifies and renews skin weekly.
  • Deeply Clarifying Blemish Spot Treatment: Targets blemishes effectively.

2

UMA Lymphatic Detox Dry Brush

Promote lymphatic drainage and circulation with the UMA Lymphatic Detox Dry Brush. Dry brushing stimulates the lymphatic system, aiding in the removal of toxins and reducing fluid retention.

3

UMA Absolute Essential Self-Massage Oil

Enjoy a self-massage ritual with the UMA Absolute Essential Self-Massage Oil. Massage into the skin to promote relaxation, circulation, and lymphatic drainage, leaving your skin feeling nourished and rejuvenated.

4

UMA Pure Palate Tongue Scraper

Support detoxification from within with the UMA Pure Palate Tongue Scraper. This ancient Ayurvedic tool helps remove toxins and bacteria from the tongue, promoting oral health and overall well-being.

5

UMA Pure Detox Oil Pulling Treatment

Experience oil pulling with the UMA Pure Detox Oil Pulling Treatment. Swish a tablespoon of oil in your mouth for 10-15 minutes to help remove toxins and bacteria, supporting oral health and detoxification.

6

UMA Body Scrubs

Extend your Ayurvedic self-care routine to the body with UMA’s range of body scrubs, including the Absolute Anti Aging Body Scrub and the Pure Love Body Scrub. These scrubs exfoliate the skin, leaving it feeling soft, smooth, and rejuvenated.

7

UMA Santal Silk Body Oil and Body Balm

Nourish and pamper your skin with the UMA Santal Silk Body Oil and Body Balm. Infused with aromatic botanicals, these products hydrate and replenish the skin, leaving it feeling silky smooth and deeply nourished.

As we transition into the spring season, it’s important to adapt our skincare routine to align with the qualities of Kapha dosha. By incorporating Ayurvedic self-care essentials like those from UMA, we can support our skin’s natural balance and vitality, promoting clarity, radiance, and overall well-being. Embrace the wisdom of Ayurveda and spring into balance with a holistic approach to skincare that nurtures body, mind, and spirit.

KERALA’S AYURVEDIC ODYSSEY: A TRAVELER’S HANDBOOK

Welcome to Kerala, the land where Ayurveda whispers through the coconut groves, where the backwaters sing the songs of rejuvenation, and where every corner seems to breathe the ancient wisdom of holistic healing. Embark on a journey of self-discovery and wellness as we delve into Kerala’s Ayurvedic Odyssey, a traveler’s handbook to the paradise of Ayurveda.

KERALA AYURVEDA TOUR: AN ENCHANTING ENTITY 

The Kerala Ayurveda Tour is not just a trip; it’s an immersion into the ancient healing tradition that dates back to 600 BC. Ayurveda is not merely a process of healing; it’s a way of life that treats an individual as a whole, harmonizing the body, mind, and spirit. Evolving from ancient roots, Ayurveda has seamlessly intertwined with modern medicine, offering a holistic approach to well-being.

QUICK FACTS ABOUT KERALA: 

  • Capital City: Thiruvananthapuram.
  • Geographical Location: Southwest India.
  • First State to Receive Rainfall in India.
  • Padmanabhaswamy Temple: The Richest Hindu Temple in the World.
  • Paradise of Ayurveda: Kerala.
  • Highest Female-to-Male Ratio.
  • Meaning of ‘Kerala’: Land of Coconuts.
  • The Land of Elephants.
  • National Geographic had declared it as Paradise of the World amongst ten others
  • It is also known as the Spice Coast of India
  • The First Church, Mosque, and Synagogue of India are in Kerala
  • Best Time to Visit: Winter season between September to March.
  • World’s best drive-in beach (Ranked best in Asia, it ranks amongst the world’s top 6 beaches for driving by BBC).

Why is Kerala famous for Ayurveda?

Kerala is the epitome of Ayurveda, blessed with a conducive climate and abundant natural herbs. Its rich tradition of holistic healing has earned it the title of the paradise of Ayurveda, drawing wellness seekers from around the globe.

LET’S VENTURE INTO “GOD’S OWN COUNTRY”- KERALA :   

DAY 1

COCHIN (KOCHI)

Begin your Ayurvedic odyssey in the vibrant city of Cochin, where history whispers through the colonial alleys and spice-scented streets. Explore the cultural tapestry of Kochi Fort, home to iconic landmarks like Mattancherry Palace, Fort Kochi Beach, and St. Francis Church. Wander through the labyrinthine lanes of the Jewish Synagogue and marvel at the Kerala Murals in the Dutch Palace. As the sun sets, witness the iconic Chinese fishing nets adorning the Vasco Da Gama Square, painting a picturesque portrait of Cochin’s maritime heritage.

COCHIN

DAY 2

COCHIN – ALLEPPEY (33.35 milles) 

Journey deeper into the heart of Kerala as you cruise along the tranquil backwaters of Alleppey, the Venice of the East. Glide past emerald rice paddies and palm-fringed canals aboard a traditional houseboat, immersing yourself in the rhythms of village life. Let the gentle lull of the backwaters soothe your soul as you surrender to the serenity of this enchanting landscape.

ALLEPPEY

DAY 3

ALLEPPEY – KOVALAM (99 miles)

Continue your Ayurvedic sojourn as you travel to the captivating shores of Kovalam, where golden sands meet azure waters in perfect harmony. Indulge in the therapeutic embrace of Ayurveda as you unwind amidst lush greenery and pristine beaches. Whether you seek exhilarating water sports or tranquil moments of reflection, Kovalam offers a sanctuary for every traveler’s soul.

KOVALAM

DAY

4-6

KOVALAM

Immerse yourself in the ancient wisdom of Ayurveda with a series of rejuvenating therapies tailored to restore balance and vitality. Under the guidance of experienced doctors, surrender to the healing touch of herbal massages, yoga, and steam baths. Let go of stress and tension as you embrace the holistic embrace of Ayurveda, nourishing body, mind, and spirit.

AYURVEDIC TREATMENT

Who is the father of Ayurveda in Kerala?

Charaka often hailed as the ‘Father of Ayurveda,’ laid the foundation of this ancient healing tradition in his seminal work, Charaka Samhita. His profound knowledge of medicinal plants and holistic healing continues to inspire practitioners to this day.


e-Samhita – National Institute of Indian Medical Heritage (NIIMH)

DAY 7

KOVALAM – TRIVANDARUM (11 miles)

Conclude your Ayurvedic odyssey with a visit to the enchanting city of Trivandrum, where palm-fringed beaches and ancient temples beckon weary travelers. Explore the rich cultural heritage of Padmanabha Swami Temple and immerse yourself in the timeless beauty of Shri Chitra Art Gallery. As you bid farewell to Kerala, carry with you the timeless wisdom of Ayurveda, a precious gift from the land of coconuts.

PADMANABHASWAMY TEMPLE

Which is the king of Ayurveda?

Ashwagandha, known as the king of Ayurvedic herbs, reigns supreme in promoting well-being, balanced energy levels, and overall good health. Just as Ashwagandha embodies resilience and vitality, Kerala embodies the essence of Ayurveda, offering a sanctuary for holistic healing and rejuvenation.

ESSENTIAL GUIDELINES FOR VISITING KERALA: TIPS AND INSIGHTS 

  • Nudity is prohibited on all Kerala beaches.
  • Smoking is banned in public places.
  • Temples enforce strict dress codes (fully covered legs and arms), and some may not allow entry to non-Hindus.
  • Look for ‘Green Leaf‘ certified Ayurvedic centers for top-tier services.
  • Olive Leaf‘ certified centers offer quality services in a ‘three-star’ category.
  • Enjoy Sadhya, a traditional multi-course meal served on banana leaves.
  • Sample local delicacies like Malabar biriyani, seafood, and banana chips.
  • Carry bottled water for hydration.
  • Kerala is India’s first state with 4 operational international airports; Thiruvananthapuram, Kannur, Kozhikode, and Cochin. 
  • Exchange foreign currency at local money changers or banks.
  • Have some cash for tips or public transport, although cards are widely accepted.

In conclusion, Kerala’s Ayurvedic Odyssey is not just a journey; it’s a transformational experience that transcends time and space. Come, embark on this enchanting voyage to the heart of Ayurveda, and discover the true essence of holistic wellness in the lap of Kerala’s natural splendor.

TO MAKE THIS EXPERIENCE MORE HOLISTIC TRAVEL WITH UMA:

REFERENCES: 

  1. https://blogs.thomascook.in/10-lesser-known-facts-about-kerala/ 
  2. https://www.travelogyindia.com/blog/know-before-kerala-ayurveda-treatments-tour/ 
  3. https://www.glimpseofsouthindia.com/tour-package/15-days-kerala-tour-ayurveda-package.html 
  4. https://www.thrillophilia.com/places-to-visit-in-kerala 
  5. https://www.holidify.com/pages/facts-about-kerala-446.html 
  6. https://www.tyndistravel.com/kerala-tourism/plan-kerala-tour
AYURVEDIC PRACTICES FOR A BALANCED A SPRING

Dr. Varalakshmi Yanamandra, a seasoned Ayurvedic practitioner and health coach, shares her insights on maintaining health during the spring season. Having personally experienced the benefits of Ayurveda in her teenage years, Dr. Yanamandra pursued a medical degree in Ayurveda and has been practicing for over 12 years. As the director of Ayur Wellness and Pain Centre, she specializes in healing complex gut health and hormonal conditions alongside imparting traditional panchakarma therapies for chronic pain relief. Additionally, she imparts her knowledge by teaching Ayurveda at the Europe Ayurveda Academy and participating as a speaker at global health events.

Spring in Ayurveda:

Ayurveda, the science of life, emphasizes living in harmony with nature. Lord Krishna in Bhagvadgeeta notes the dominance of spring, a season characterized by warmth, unctuousness, and moisture – qualities associated with Kapha dosha. Dr. Yanamandra explains the importance of adapting one’s diet and lifestyle to counterbalance the effects of Kapha during this season.

Do’s for Spring Wellness:

  • Tastes: Pungent, bitter, and astringent tastes are recommended to reduce Kapha.
  • Protein Foods: Opt for warming legumes and meats like turkey, chicken, rabbit, and venison.
  • Exercise: Engage in gentle activities like walking or specific yoga poses to combat Kapha.
  • Vegetables: Include artichoke, broccoli, spinach, and other Kapha-pacifying vegetables.
  • Spring Drinks: Consume herbal teas with ginger and honey water made with plain boiled and cooled water, or lassi with a pinch of shunti for warmth.
  • Ayurvedic Detox: Spring is ideal for Panchakarma treatments to balance Kapha.

Don’ts for Spring Wellness:

  • Avoid Animal Proteins: Seafood, beef, lamb, and pork can increase Kapha.
  • Limit Unctuous Foods: Say no to oily, greasy foods, cheese, and cold items.
  • Skip Day Naps: Resist the temptation to nap during the day, as per Ayurvedic advice.
  • Certain Vegetables: Cucumbers, olives, tomatoes (raw), and sweet potatoes can exacerbate Kapha.

BALANCING KAPHA DOSHA IN SPRING:

Dr. Yanamandra emphasizes the importance of balancing Kapha dosha during the spring season to prevent imbalances in the body and mind. She outlines practical steps for maintaining this balance:

Spring Do’s for Kapha Dosha:

  • Kapha-Pacifying Diet: Incorporate light and warming foods, fresh fruits, vegetables, whole grains, and warming spices.
  • Daily Exercise: Regular, gentle exercises like yoga, brisk walking, or dancing.
  • Daily Self-Care: Adopt self-care practices such as oil massage, dry brushing, and sauna therapy.
  • Adequate Rest: Ensure 7-8 hours of sleep per night with a relaxing bedtime routine.
  • Mindfulness Practices: Include meditation, deep breathing, and journaling for stress reduction.

Spring Don’ts for Kapha Dosha:

  • Avoid Heavy and Oily Foods: Fried, dairy, and meat products can clog the digestive system.
  • Maintain Regular Mealtime: Irregular eating habits can lead to digestive issues.
  • Limit Refrigerated Foods: Cold and processed items can cause inflammation and reduce immunity.
  • Mild Sun Exposure: Overexposure to the sun can lead to skin damage and increased Pitta dosha.
  • Healthy Sleep Patterns: Avoid staying up late or excessive screen time to prevent disruptions in sleep patterns.[1]

In conclusion, Dr. Varalakshmi Yanamandra provides a comprehensive guide to navigating the spring season through Ayurveda. By following these dos and don’ts, individuals can cultivate a healthy and balanced routine tailored to their unique needs. Happy Spring!

Reference Links:

6 NATURAL TIPS FOR SPRINGTIME FERTILITY: ENHANCING HEALTH

Springtime brings with it a sense of renewal and rejuvenation, not only in nature but also within our bodies. As the days lengthen and the earth awakens, it’s an opportune moment to focus on enhancing women’s reproductive health. Combining modern knowledge with ancient wisdom from Ayurveda, here are six tips tailored to harness the fertility-boosting potential of spring:

1

EMBRACE NUTRIENT-RICH SPRING PRODUCE

In Ayurveda, seasonal eating is emphasized as a means to maintain balance and vitality. Spring offers an array of fresh fruits and vegetables that can nourish and support reproductive health. Incorporate leafy greens like spinach and kale, known for their detoxifying properties, into your meals. Enjoy the sweetness of seasonal fruits like strawberries and apricots, which are rich in antioxidants and vitamins essential for fertility.

2

PRIORITIZE WHOLE FOODS AND HEALTHY FATS

Ayurveda emphasizes whole foods and healthy fats for overall well-being. Opt for easily digestible options like basmati rice, quinoa, avocados, ghee, and coconut oil, along with omega-3 fatty acids from salmon or flaxseeds for hormone production and reproductive function. Spring invites experimentation with fertility-enhancing recipes such as Spinach and Red Pepper Omelet for protein and folate, Cucumber-Carrot Salad for vitamins and minerals, or Avocado and Prawn Salad for healthy fats and protein, all supporting fertility.

Integrate zinc-rich foods like oysters, beef, pumpkin seeds, and beans, or consider supplements to support hormone regulation and egg development. Enjoy fertility-boosting superfoods such as pomegranate juice, dark chocolate, tomatoes, walnuts, lentils, and parmesan cheese popcorn, all contributing to reproductive health.

3

FOLLOW AYURVEDIC DAILY AND SEASONAL ROUTINES

Ayurveda prescribes specific daily and seasonal routines, known as Dinacharya and Ritucharya, respectively, to align with the natural rhythms of the body and environment. Incorporating practices such as oil massage (Abhyanga), nasal cleansing (Nasya), and tongue scraping (Jihwa Prakshalana) can help support reproductive health by promoting detoxification and balancing the doshas.

4

INCORPORATE AYURVEDIC HERBS AND RASAYANA

Just as in winter, when Ayurveda recommends consuming Rasayana herbs to enhance vitality, spring offers an opportunity to support reproductive health with specific herbs. Herbs like Shatavari, Ashwagandha, and Gokshura are traditionally used to nourish the reproductive system and promote hormonal balance. Consult with an Ayurvedic practitioner to determine the most suitable herbs for your individual needs.

5

CULTIVATE MINDFULNESS AND STRESS MANAGEMENT 

Stress can have a profound impact on reproductive health, disrupting hormonal balance and menstrual cycles. Incorporate stress-reducing practices such as yoga, meditation, and deep breathing exercises into your daily routine. Take time to connect with nature, whether it’s through leisurely walks in the springtime sunshine or mindful moments spent in a garden.

6

SEEK HOLISTIC SUPPORT

Ayurveda views the individual as a whole, considering the interconnectedness of body, mind, and spirit. Seek holistic support from qualified Ayurvedic practitioners who can offer personalized guidance and treatments tailored to your unique constitution and health goals. By addressing imbalances on all levels, you can optimize your chances of achieving and maintaining reproductive health.

In conclusion, spring offers a fertile ground for nurturing women’s reproductive health naturally, guided by the principles of Ayurveda. By embracing nutrient-rich foods, following Ayurvedic daily and seasonal routines, incorporating herbal support, cultivating mindfulness, and seeking holistic guidance, women can empower themselves on their journey toward conception. As nature blossoms around us, may this season herald new beginnings and abundant blessings on your path to parenthood.

5 HERBAL ALLIES FOR SPRING DIGESTION: A GUIDE TO SEASONAL TEAS

As spring unfolds its vibrant colors and fragrances, our bodies often crave a refreshing change. Just as nature undergoes a renewal, so too can our digestive systems benefit from a rejuvenating touch. Enter herbal teas—elixirs of nature that not only tantalize our taste buds but also promote digestion and soothe the digestive system. In this guide, we’ll explore some herbal allies perfect for springtime, each offering a unique blend of flavors and health benefits.

PEPPERMINT PUNCH

Peppermint is a green herb from the Mentha piperita plant, celebrated for its refreshing flavor and digestive prowess. A 2018 Study has shown that menthol, a compound in peppermint, can improve digestive issues. Peppermint oil, known for its effectiveness against irritable bowel syndrome (IBS), has demonstrated remarkable results in clinical trials. To harness the digestive benefits of peppermint, consider making a simple peppermint tea:[1], [2], [3]

Recipe: Peppermint Tea

  • Ingredients: 7–10 fresh peppermint leaves or 1 peppermint tea bag, 1 cup (250 ml) boiled water
  • Instructions: Soak the leaves or tea bag in boiled water for 10 minutes, then strain and enjoy.

GINGER ZING 

Ginger, scientifically known as Zingiber officinale, boasts a rich history as a spice and medicinal herb. Compounds like gingerols and shogaols in ginger stimulate stomach contractions and emptying, making it an effective remedy for nausea, cramping, and indigestion. A daily dose of ginger has been shown in a 2019 study to alleviate nausea and vomiting caused by various factors. To incorporate ginger into your routine, try this simple ginger tea recipe: [4], [5], [6]

Recipe: Ginger Tea

  • Ingredients: 2 tablespoons (28 grams) sliced ginger root, 2 cups (500 ml) water
  • Instructions: Boil ginger in water for 10–20 minutes, strain, and sip your way to digestive bliss.

 BLACK TEA BLISS 

Black tea, derived from the Camellia sinensis plant, is a versatile beverage often blended with other plants to create delightful varieties like English Breakfast and Earl Grey. Black tea contains thearubigins, which may aid digestion, and theaflavins, powerful antioxidants that can protect against stomach ulcers. To enjoy the digestive benefits of black tea, try this simple recipe: [7], [8], [9

Recipe: Black Tea

  • Ingredients: 1 black tea bag, 1 cup (250 ml) boiled water
  • Instructions: Steep the tea bag in boiled water for 5–10 minutes, then savor the comforting notes of black tea.

FENNEL FUSION 

With its licorice-like taste, Fennel emerges as a digestive ally from the Foeniculum vulgare plant. Animal studies suggest that fennel can prevent stomach ulcers, thanks to its antioxidant compounds. Additionally, fennel may relieve constipation and promote bowel movements, making it a versatile herb for digestive health. Try making fennel tea with this straightforward recipe: [10], [11

Recipe: Fennel Tea

  • Ingredients: 1 teaspoon (4 grams) fennel seeds, 1 cup (250 ml) boiled water
  • Instructions: Pour boiled water over fennel seeds, sit for 5–10 minutes, strain, and enjoy the soothing taste of fennel tea.

CUMIN, CORIANDER AND FENNEL (CFF) TEA 

A classic yogic and Ayurvedic concoction, Cumin, Coriander, and Fennel Tea offer a triple threat to digestive troubles. These spices not only reduce inflammation but also enhance nutrient absorption and boost digestive fire. 

Recipe: CCF Tea

  • Ingredients: 1 liter water, 1 tsp cumin seeds, 1 tsp coriander seeds, 1 tsp fennel seeds, 1 tsp honey (optional)
  • Instructions: Boil water with spices for 15 minutes, strain into a mug or flask, and sip throughout the day. Add honey for sweetness.

SAFETY PRECAUTIONS

While herbal teas are generally safe, it’s crucial to exercise caution. Some teas may not be suitable for children, or pregnant or lactating women. Additionally, herbs can interact with medications, and excessive consumption may lead to unwanted side effects. Start with a low dose when trying a new herbal tea and consult your doctor if you have existing health conditions or are on medications.

As you embrace the beauty of spring, let these herbal allies accompany you on your journey to improved digestion and overall well-being. Sip, savor, and let nature’s bounty work its magic within you.

*UMA does not encourage animal testing; we are a cruelty-free, PETA-supporting company dedicated to ethical practices